TABLE OF CONTENTS
NoahFace supports allocating worked time to specific cost centers. Cost centers can be assigned in many ways, including:
This Tech Note covers the synchronization of cost center trees from your HR platform, the viewing of cost centers in the NoahFace Dashboard, manually selecting cost centers while clocking in, and populating timesheets with the selected cost center values.
Synchronizing Cost Centers
To make use of cost centers within NoahFace, you first need to syncrhonize them from your HR platform.
UKG Ready
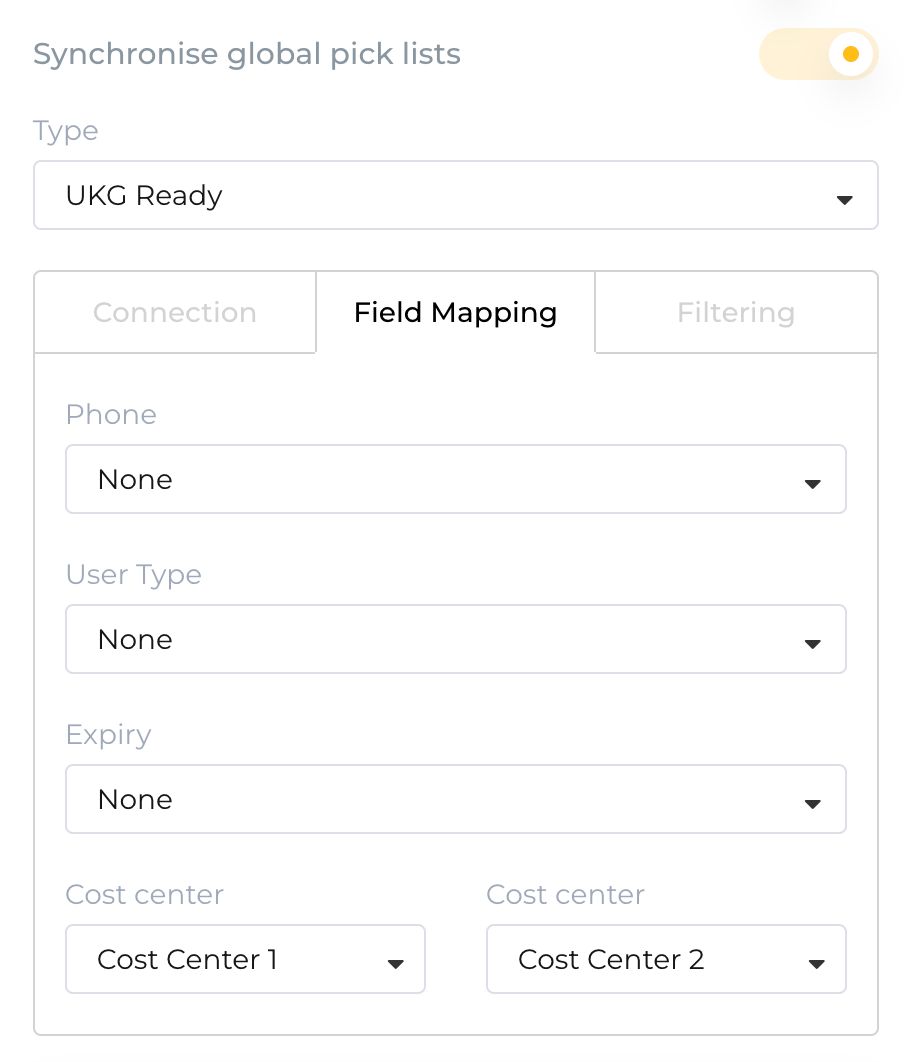
You can synchronize your UKG Ready "Cost Center" trees to NoahFace. To do this, just edit your synchronization, enable the "Synchronize global pick lists" switch, and select the specific cost center trees you want to synchronize:
Employment Hero Payroll
You can synchronize your Employment Hero Payroll "Location" tree to NoahFace. To do this, just edit your synchronization and enable the "Synchronize global pick lists" switch:

Viewing Cost Centers
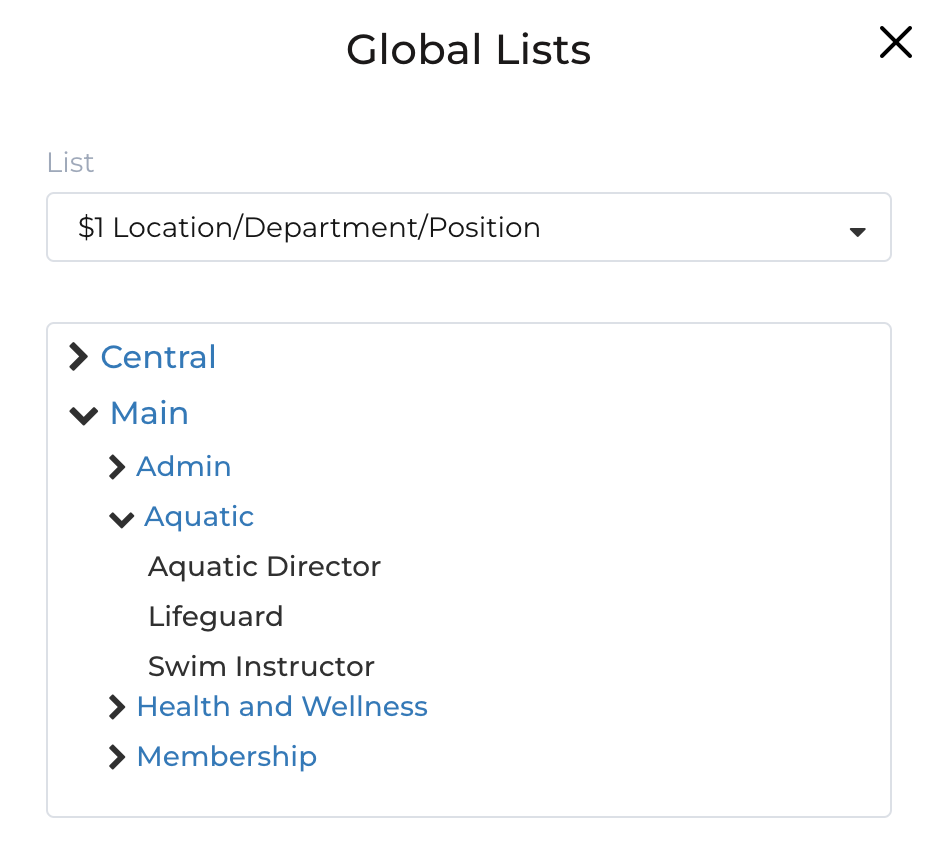
Once they have been synchronized, you can view your cost center trees in the NoahFace Dashboard. Just select "Global Lists" against your Synchronization:
Screen Configuration
One Level Cost Center Trees
Some cost center trees are simple lists, representing:
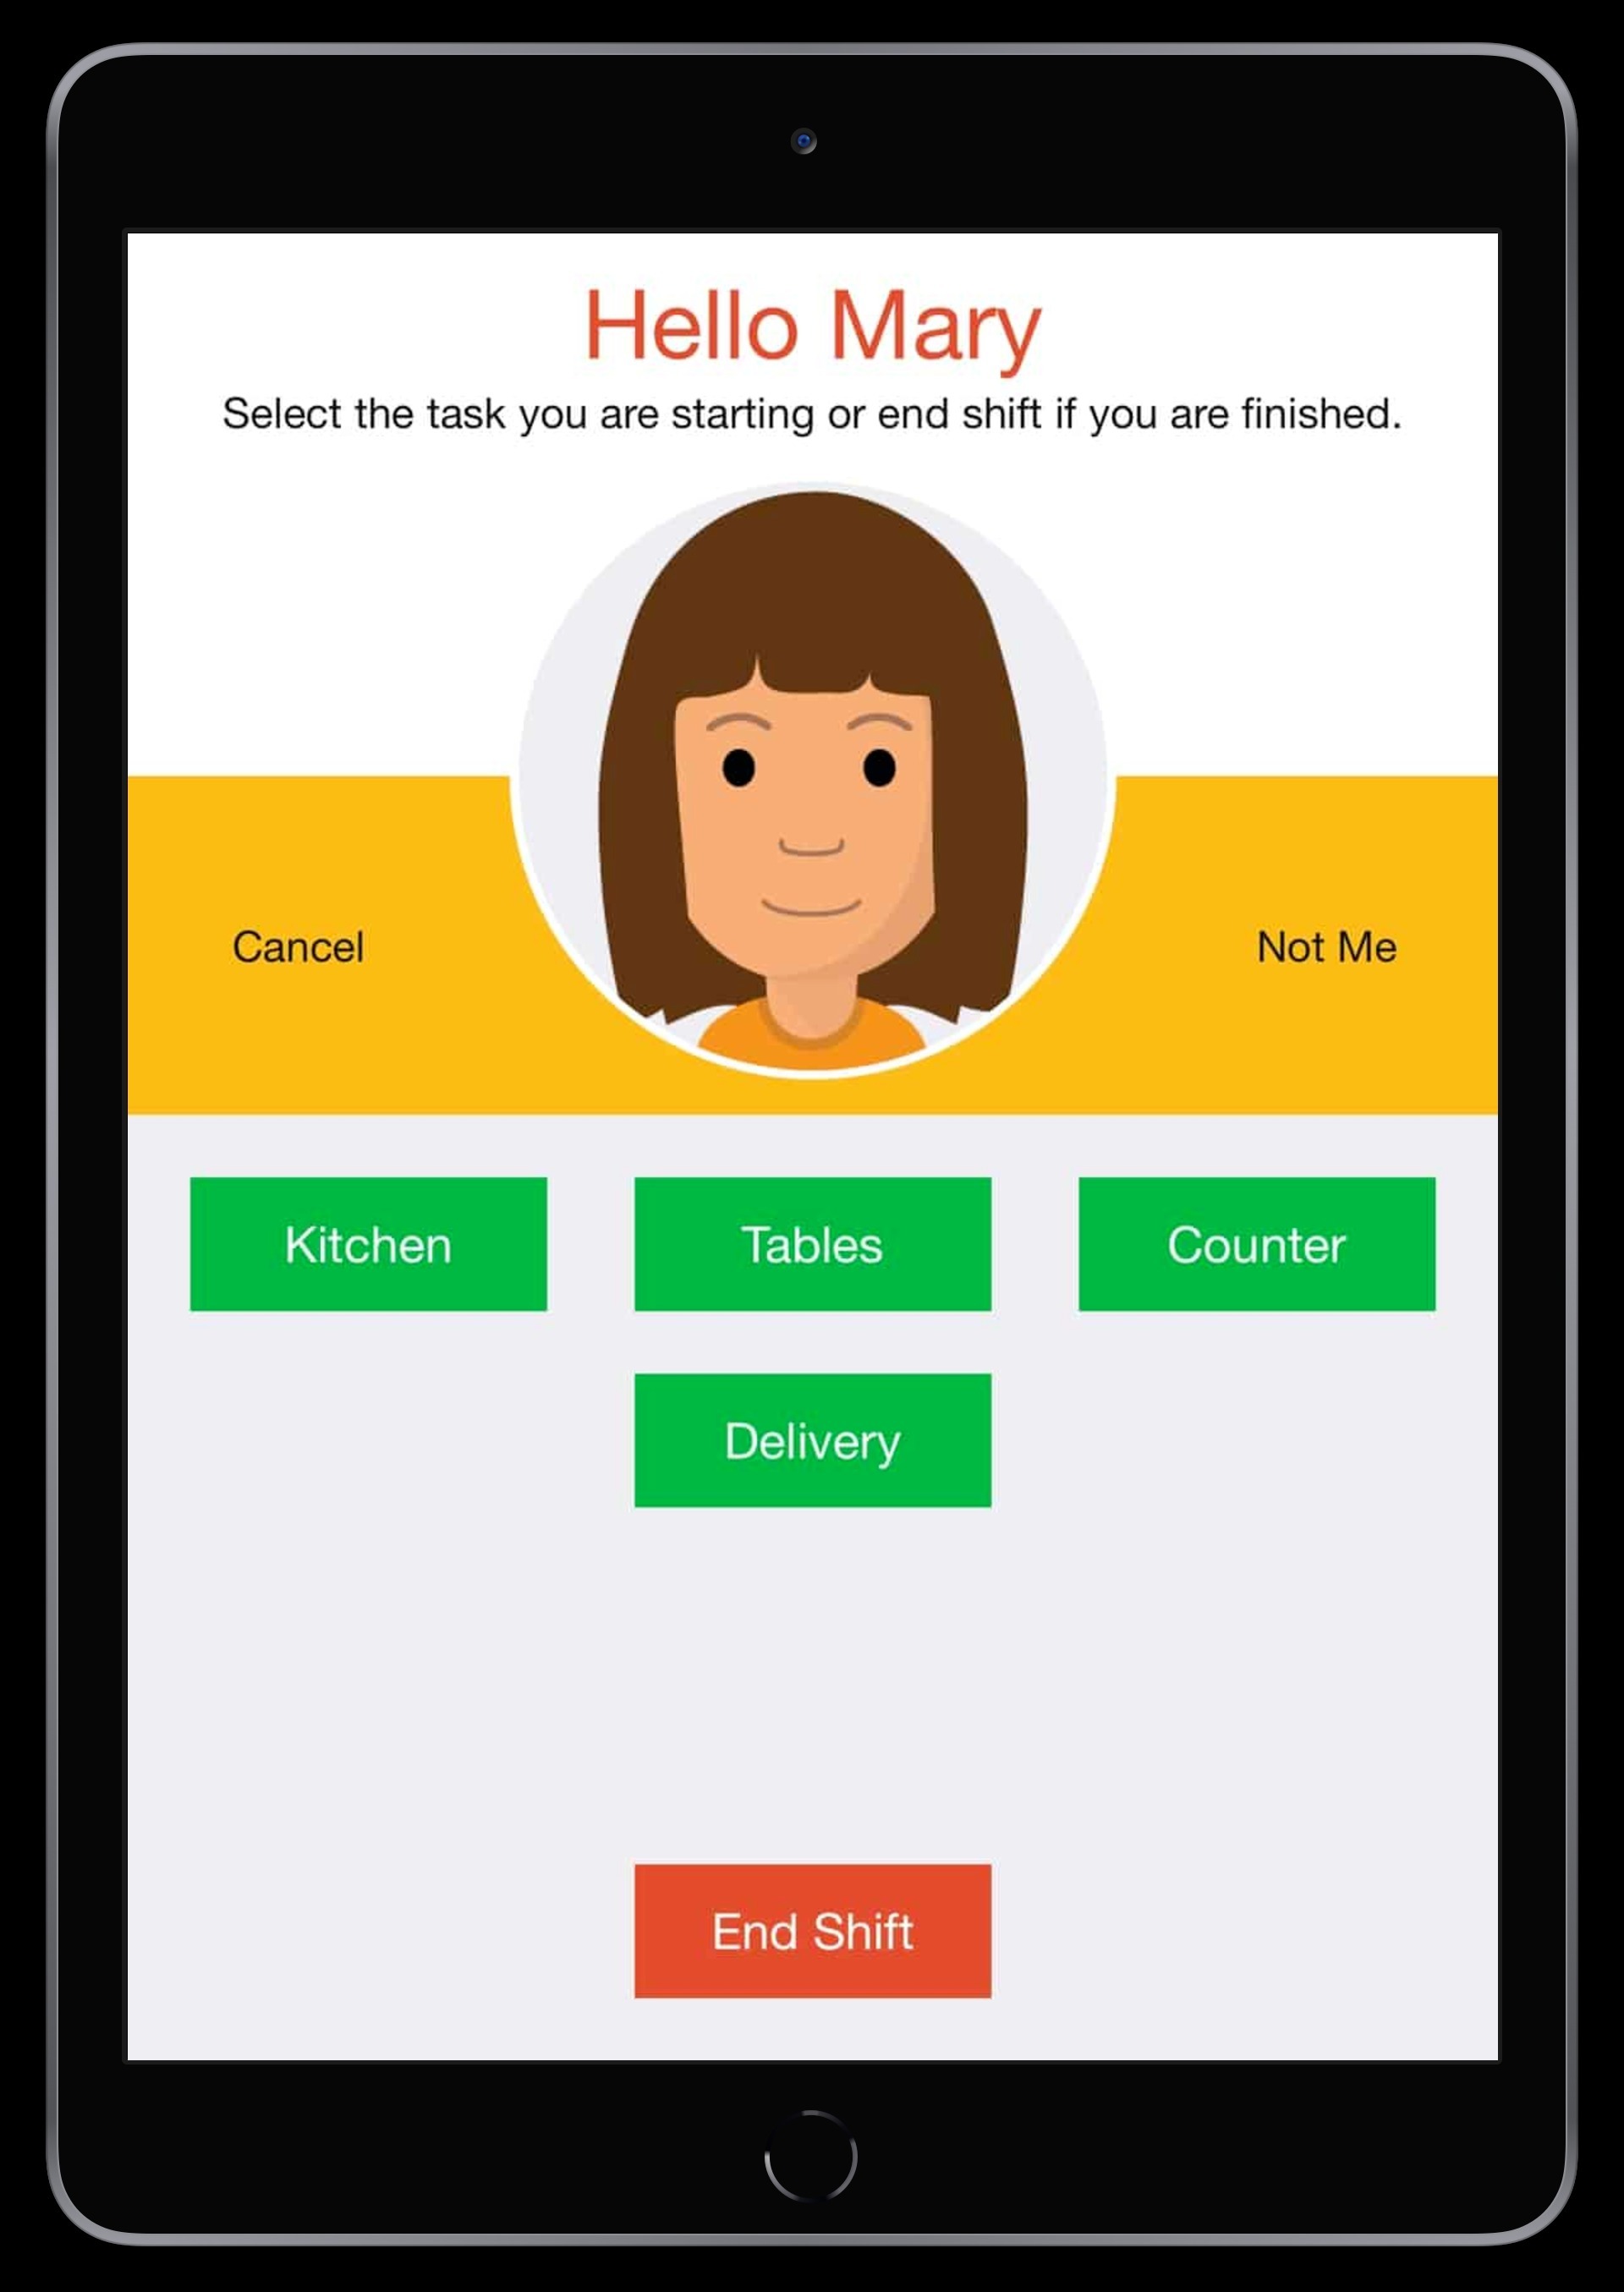
In these cases you can either present the list of options as a series of buttons or as a pick list. Presenting the list of options as buttons creates the most efficient user experience, and is appropriate when there are a small number of options and employees change their cost center allocations multiple times a day:
This can be configured as follows:
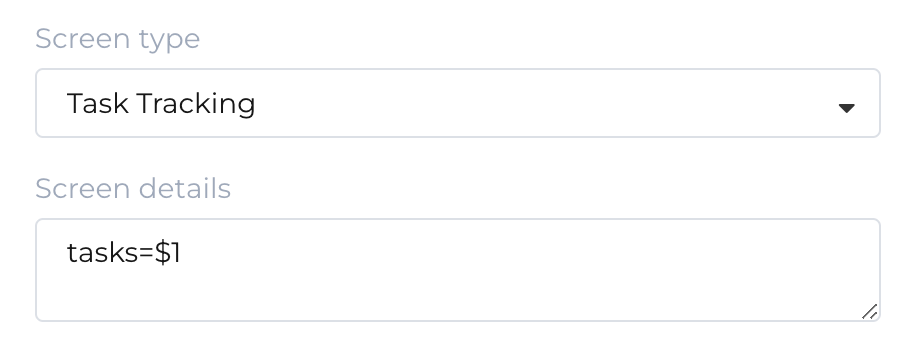
Copy Example:
tasks=$1
Presenting the list of options as a pick list is appropriate when there are a larger number of options and/or when employees rarely change their cost center allocations:
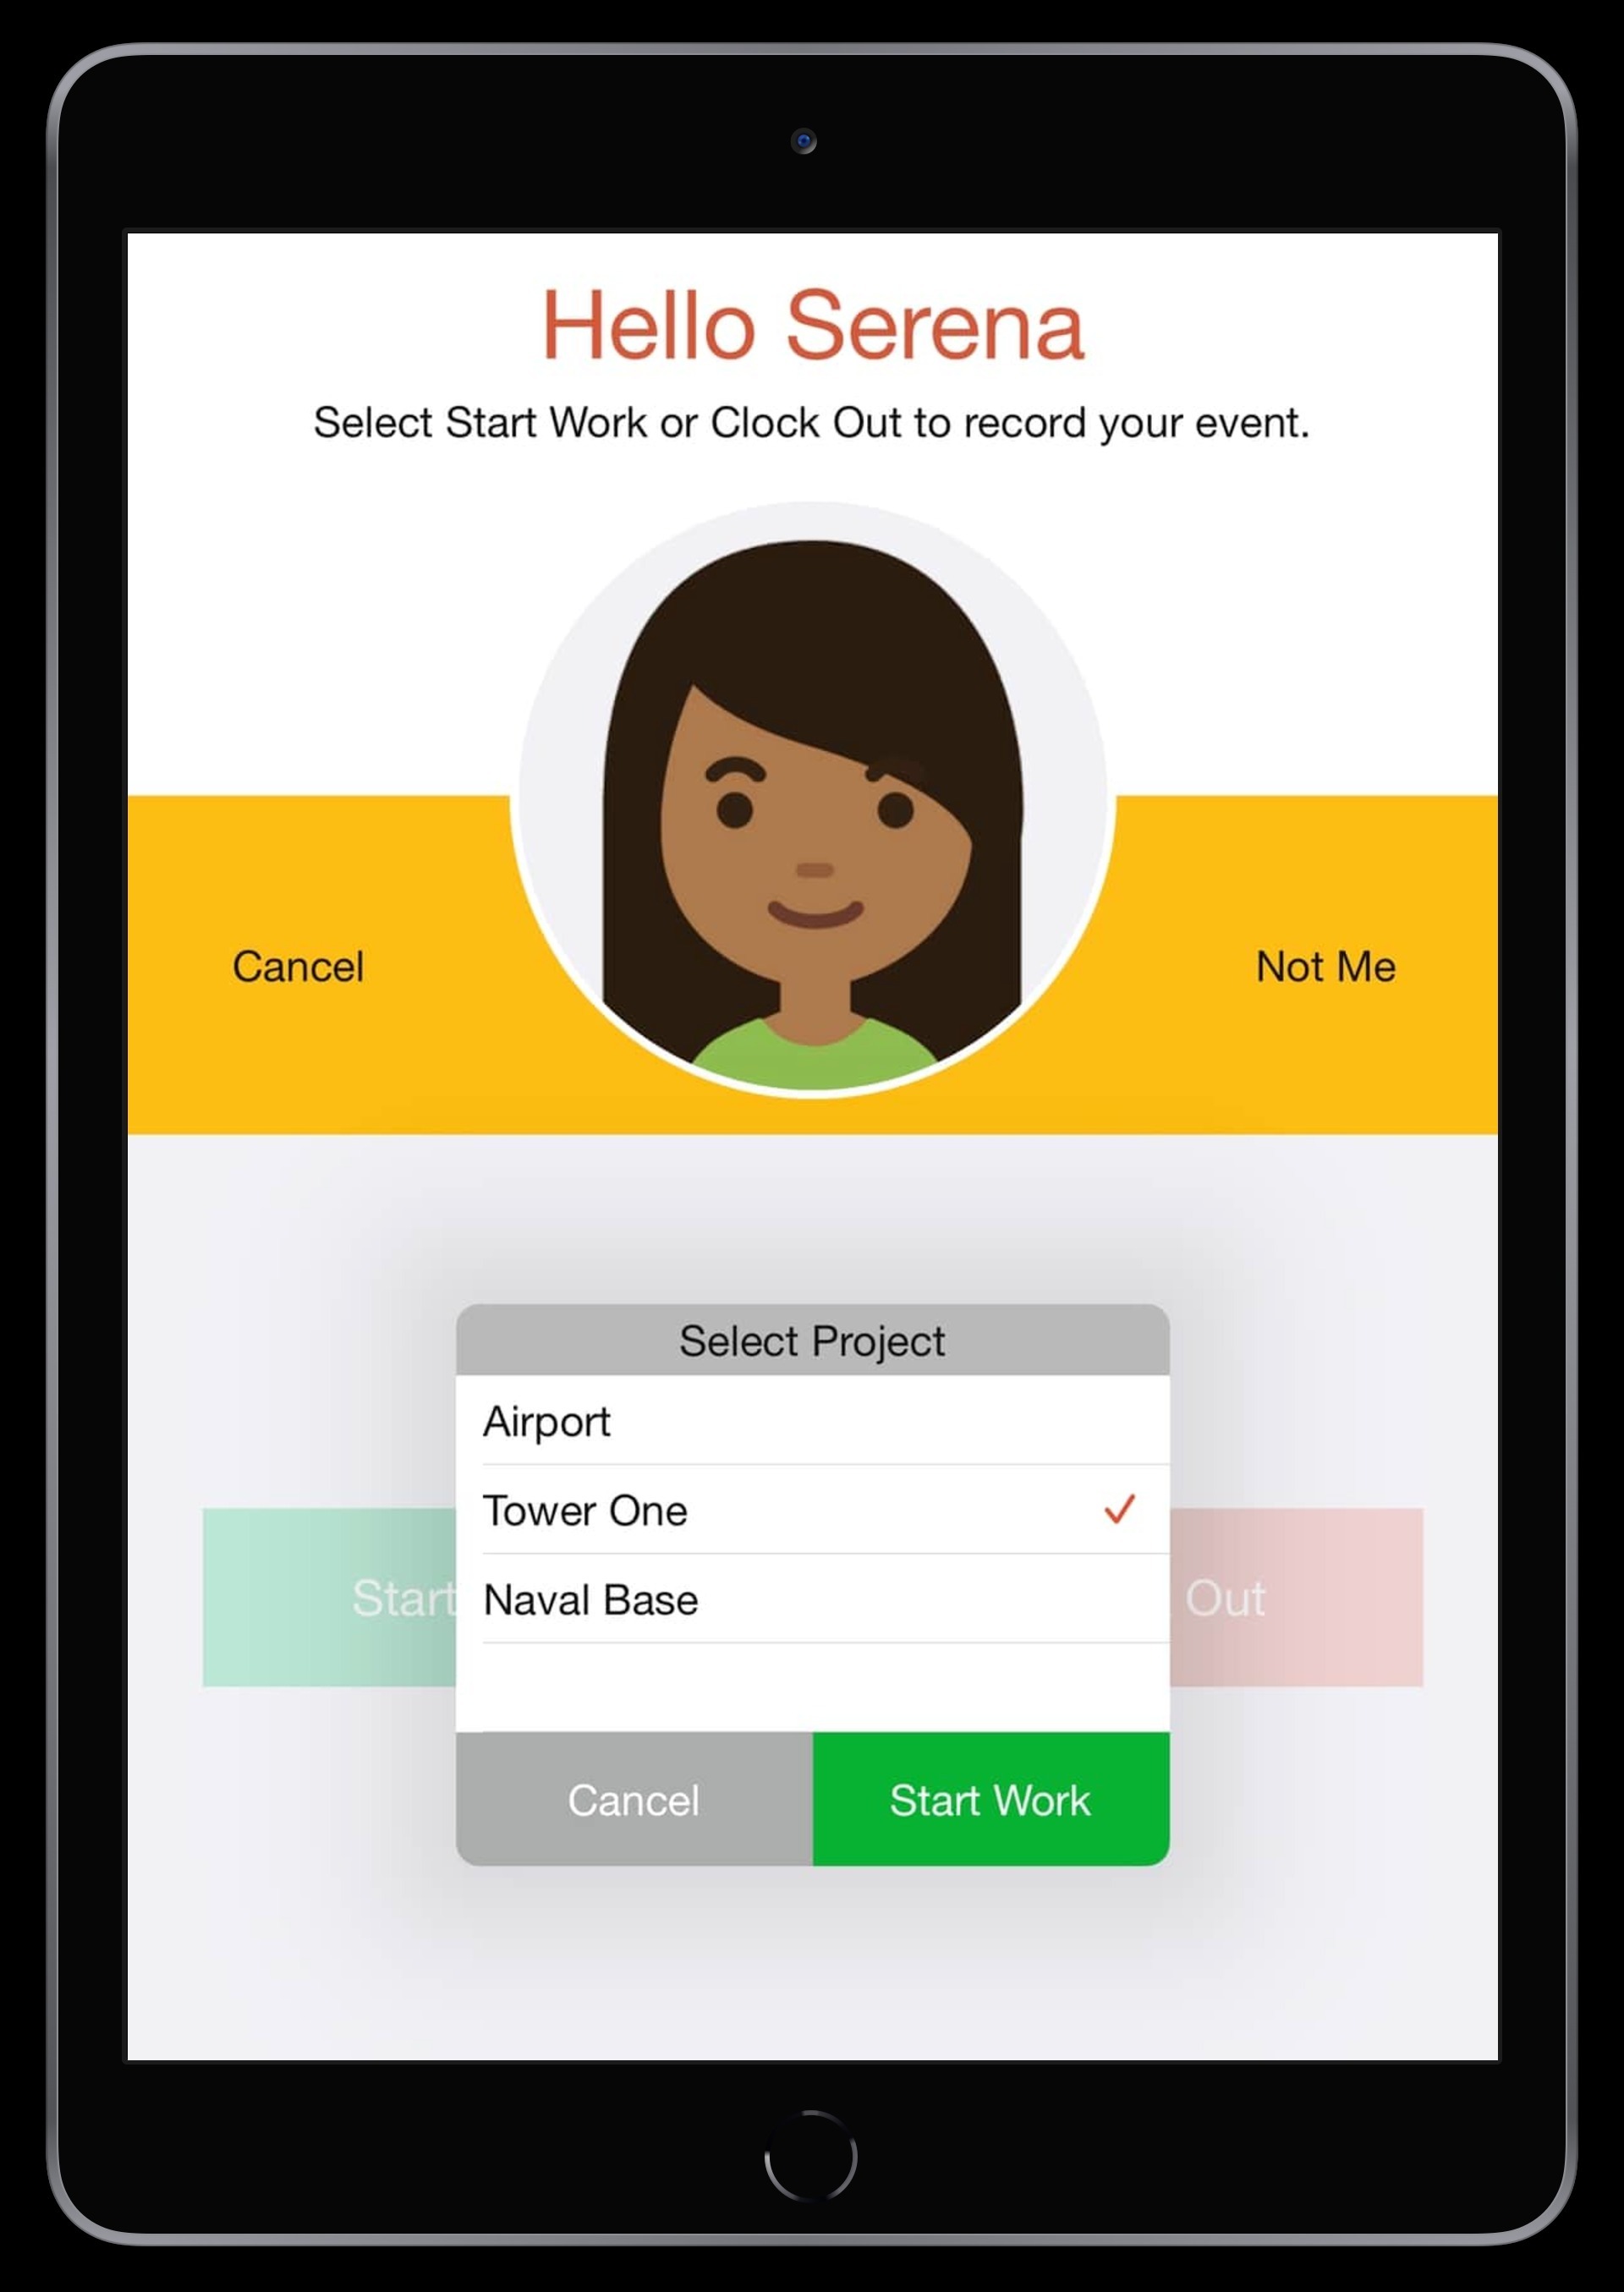
This can be configured as follows:
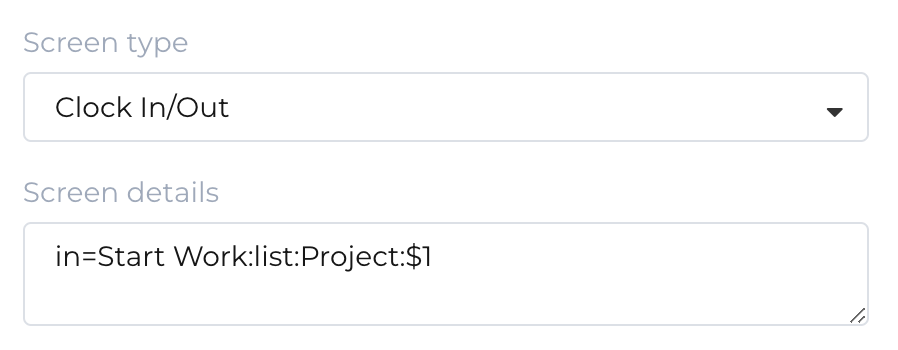
in=Start Work:list:Project:$1
If you have a very large number of entries and want to employees to be able to search the list, see Multi Level and Large Cost Center Trees below.
Two Level Cost Center Trees
Many cost center trees are two levels deep. For example:
In these cases you can present your cost center as two nested pick lists, such as the following:
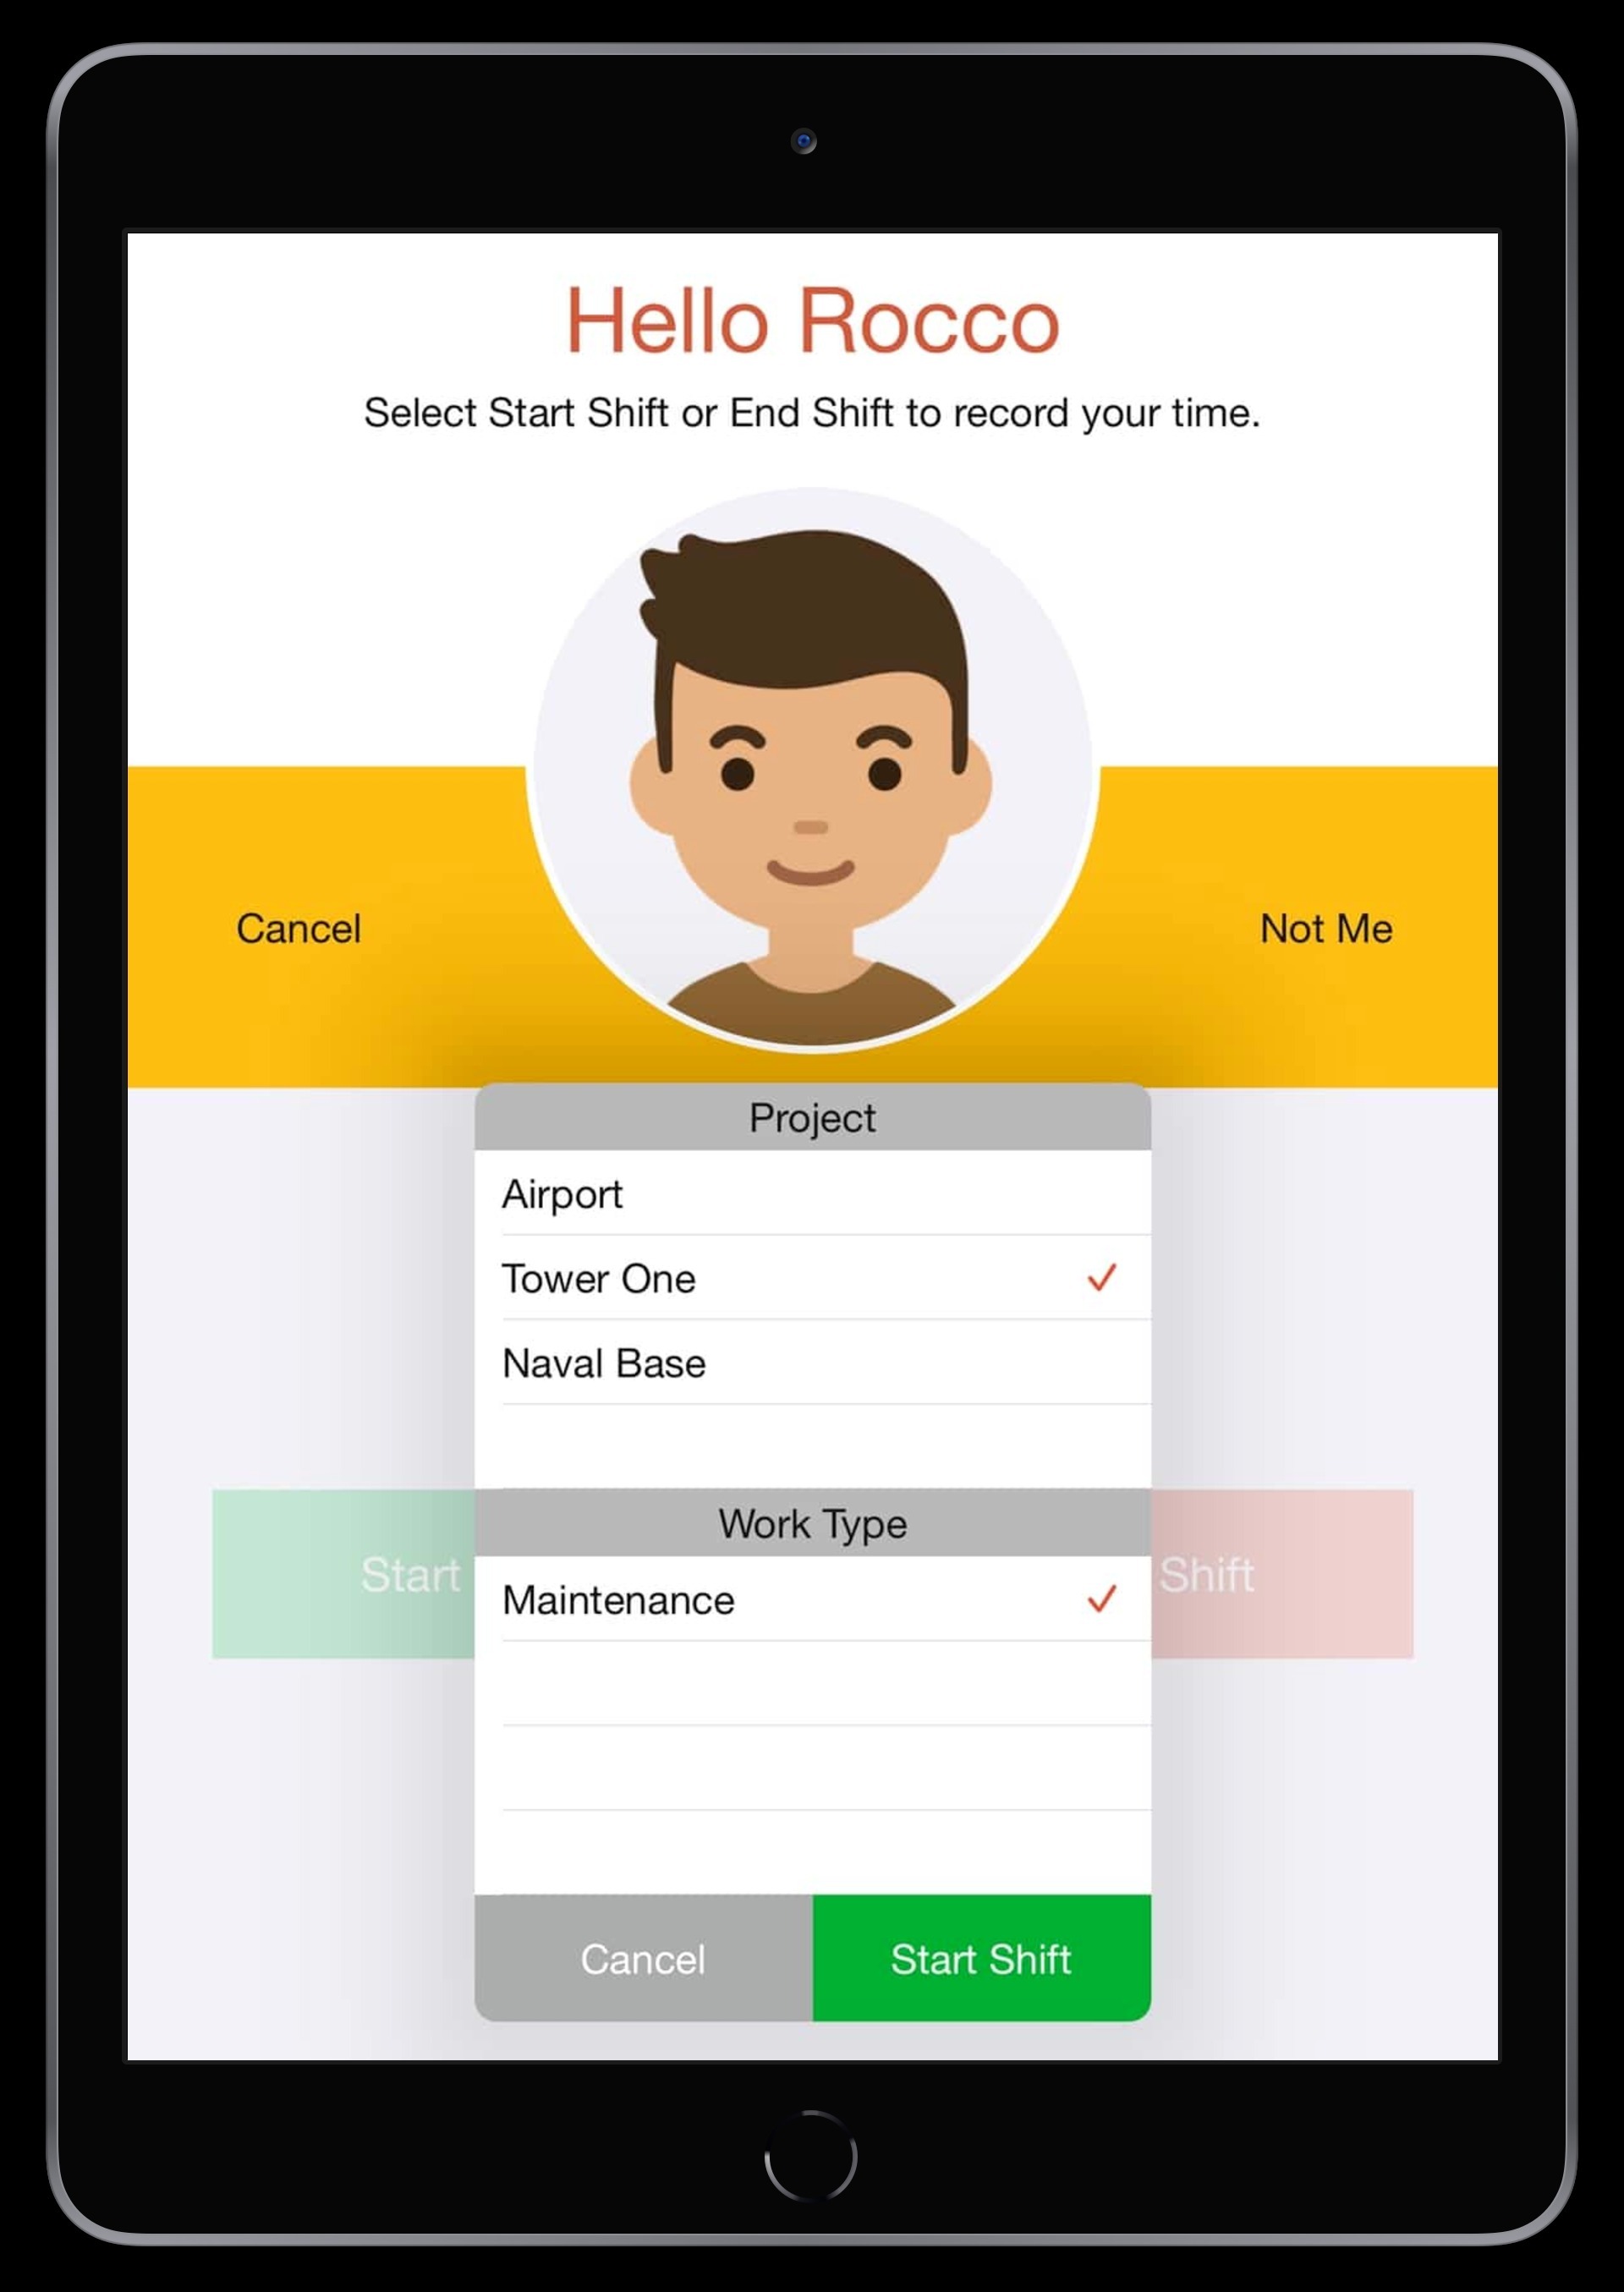
This can be configured as follows:
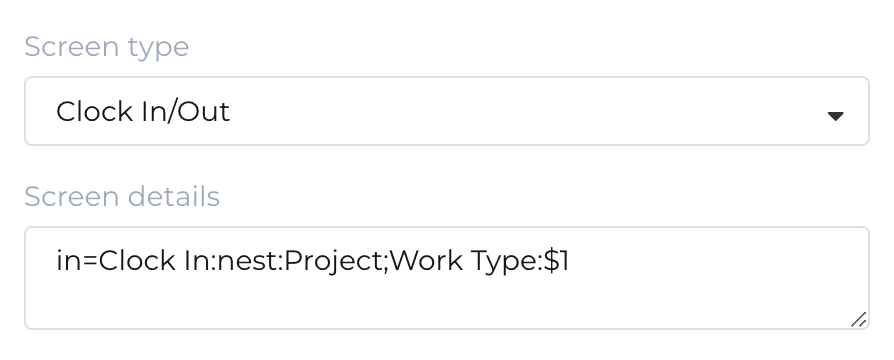
in-Clock In:nest:Project;Work Type:
If you have a very large number of entries and want to employees to be able to search the list, see Multi Level and Large Cost Center Trees below.
Multi-Level and Large Cost Center Trees
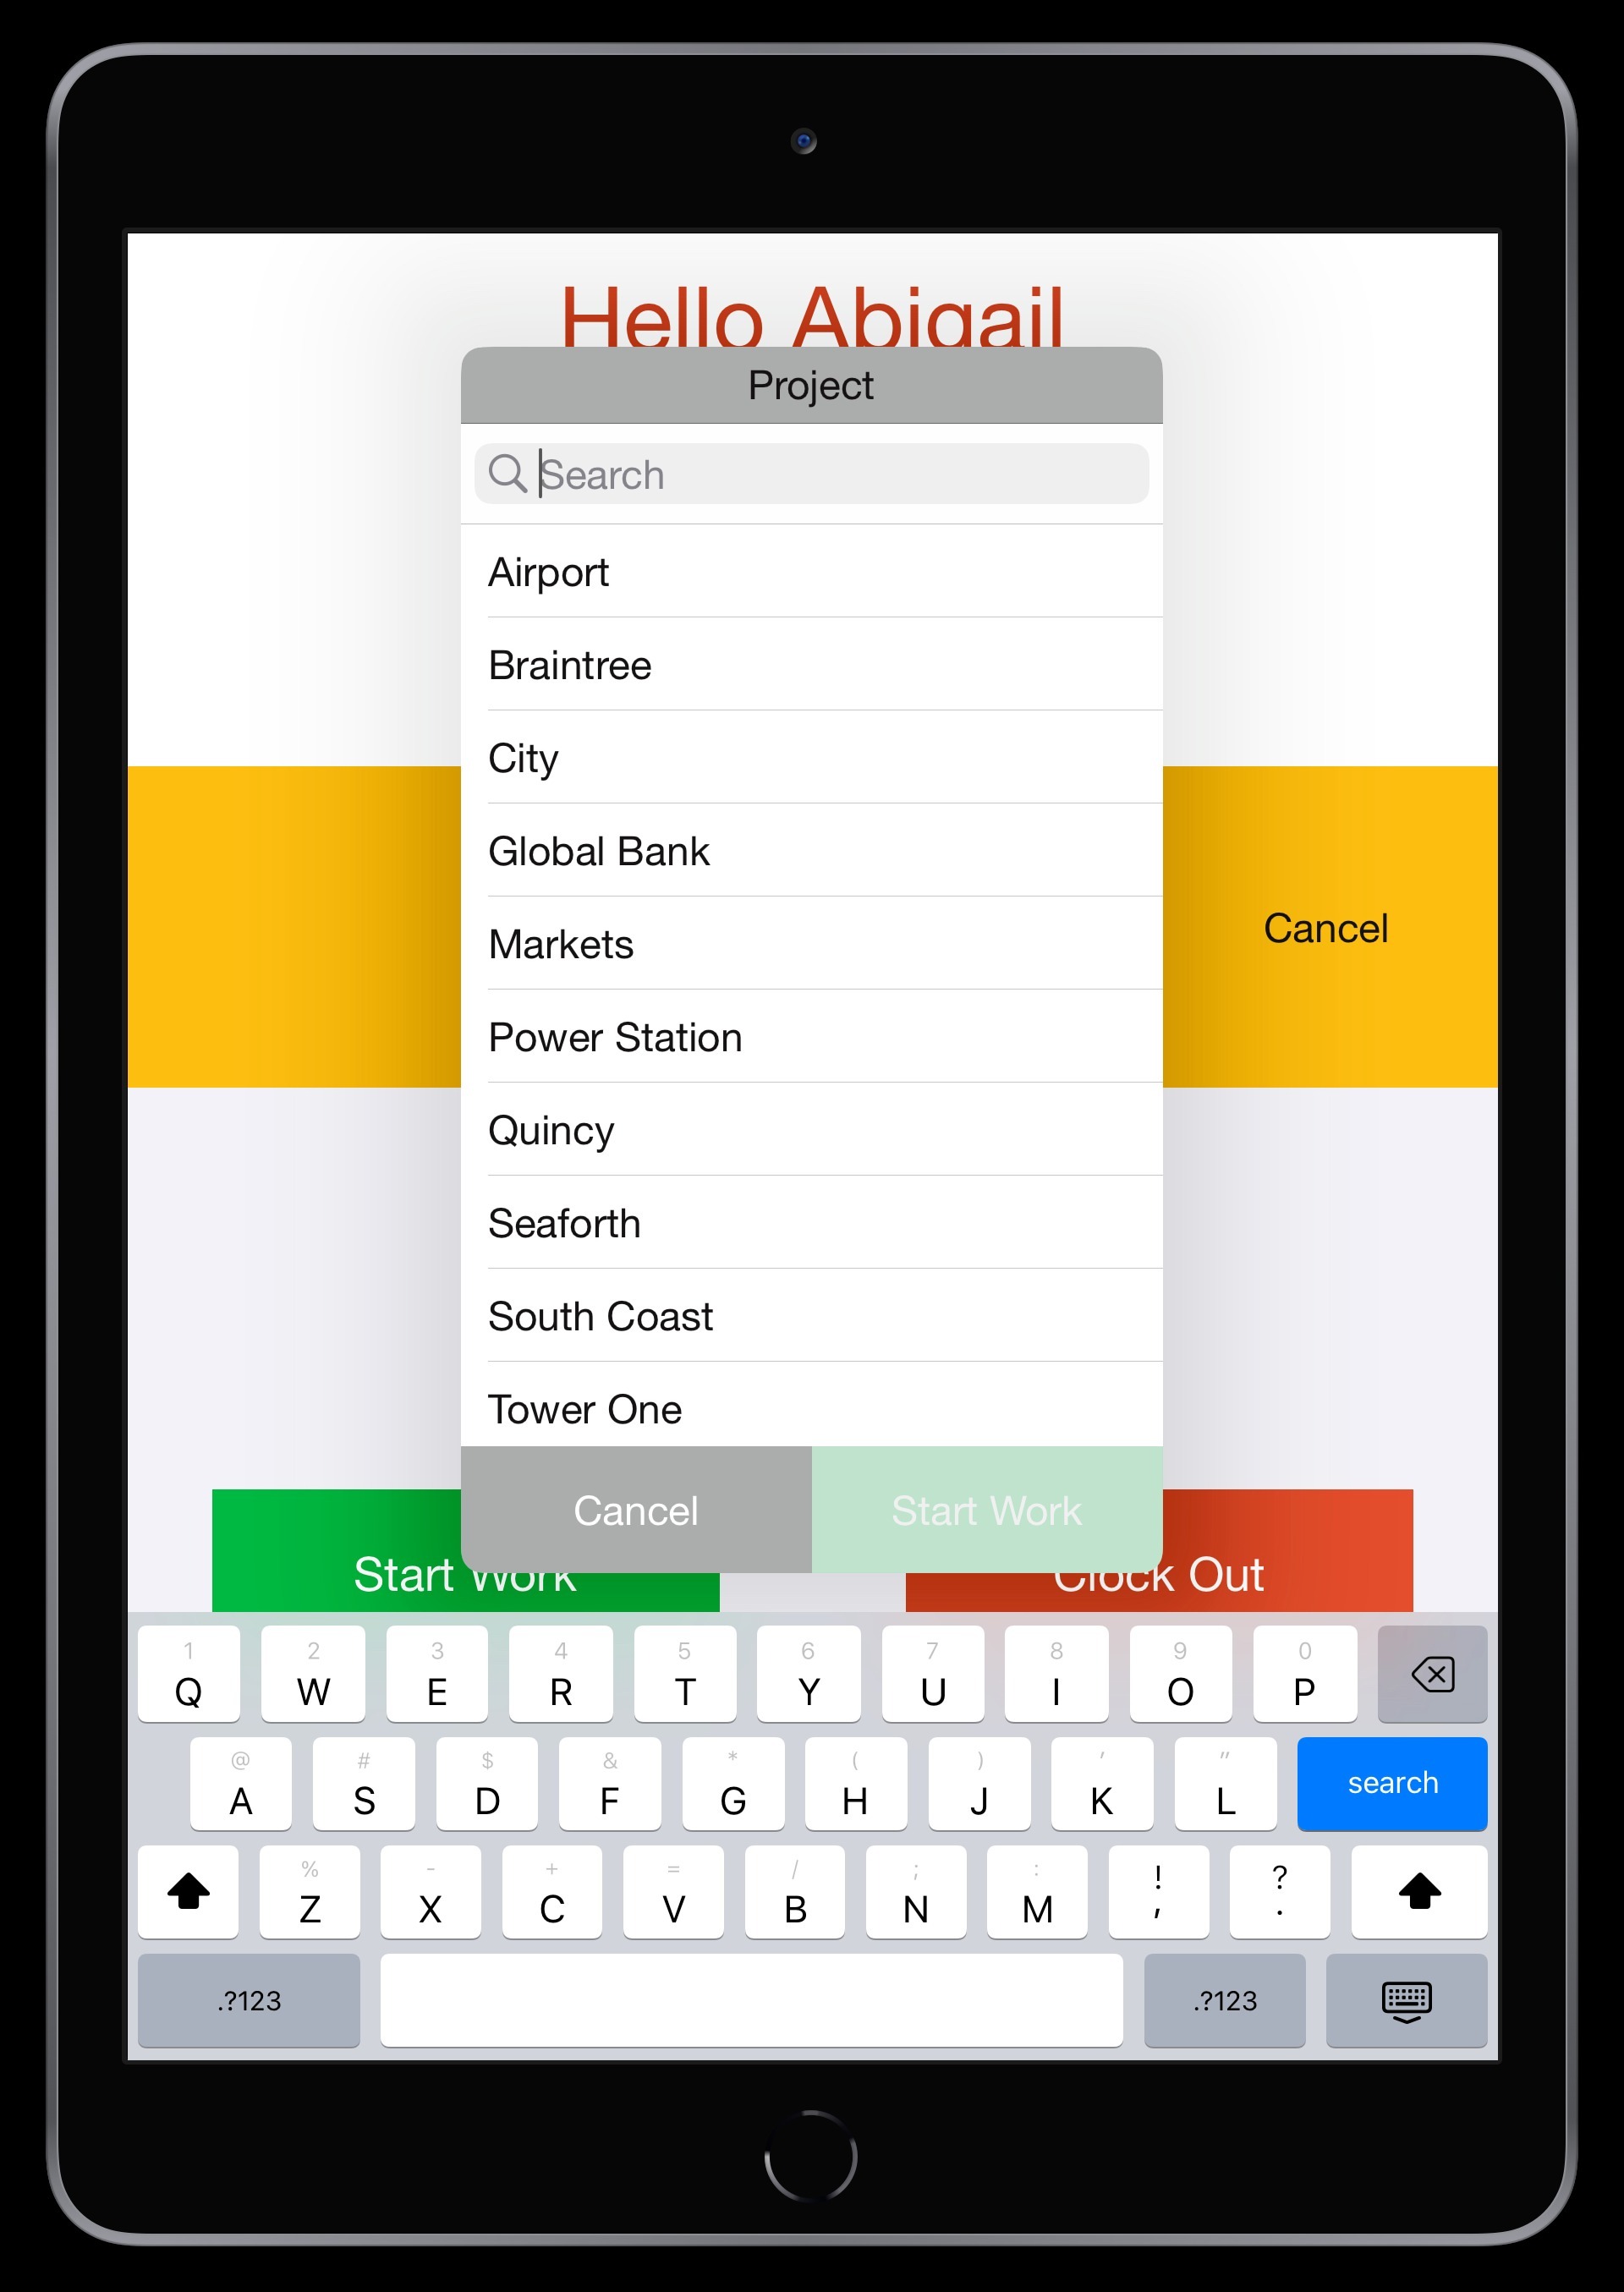
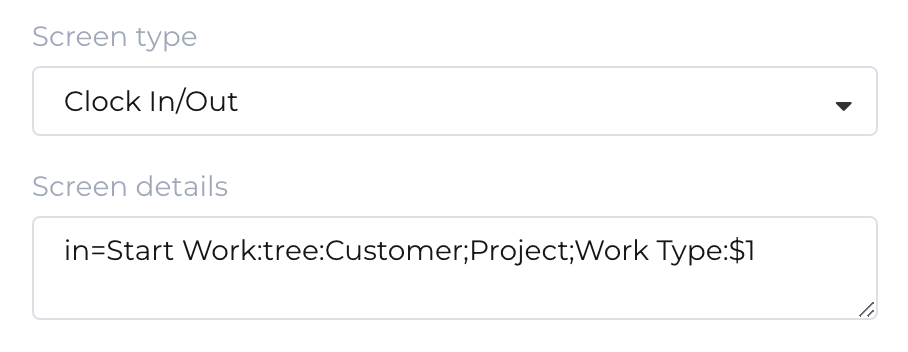
Some cost center trees are more than two levels deep or they have too many options to present as two nested pick lists. In these cases you can present tree one level at a time, until the lowest level cost center is selected. If there are a large number of options at any level in the tree, a search option will be provided automatically, with searching possible on both the names (eg: project names, customer names) and their associated codes (eg: project codes, job numbers, etc):
This can be configured as follows:
Site Specific Cost Centers
Some cost center trees have the site as the top level with departments or work types at lower levels. This is common in a number of industries, such as:
In these cases you can filter your cost center tree so that only the appropriate sub-tree is presented at each site. Both two level cost center trees (eg: the site and work types under each site) and three level cost center trees (eg: the site, and then departments and positions under each site) are supported. For example:
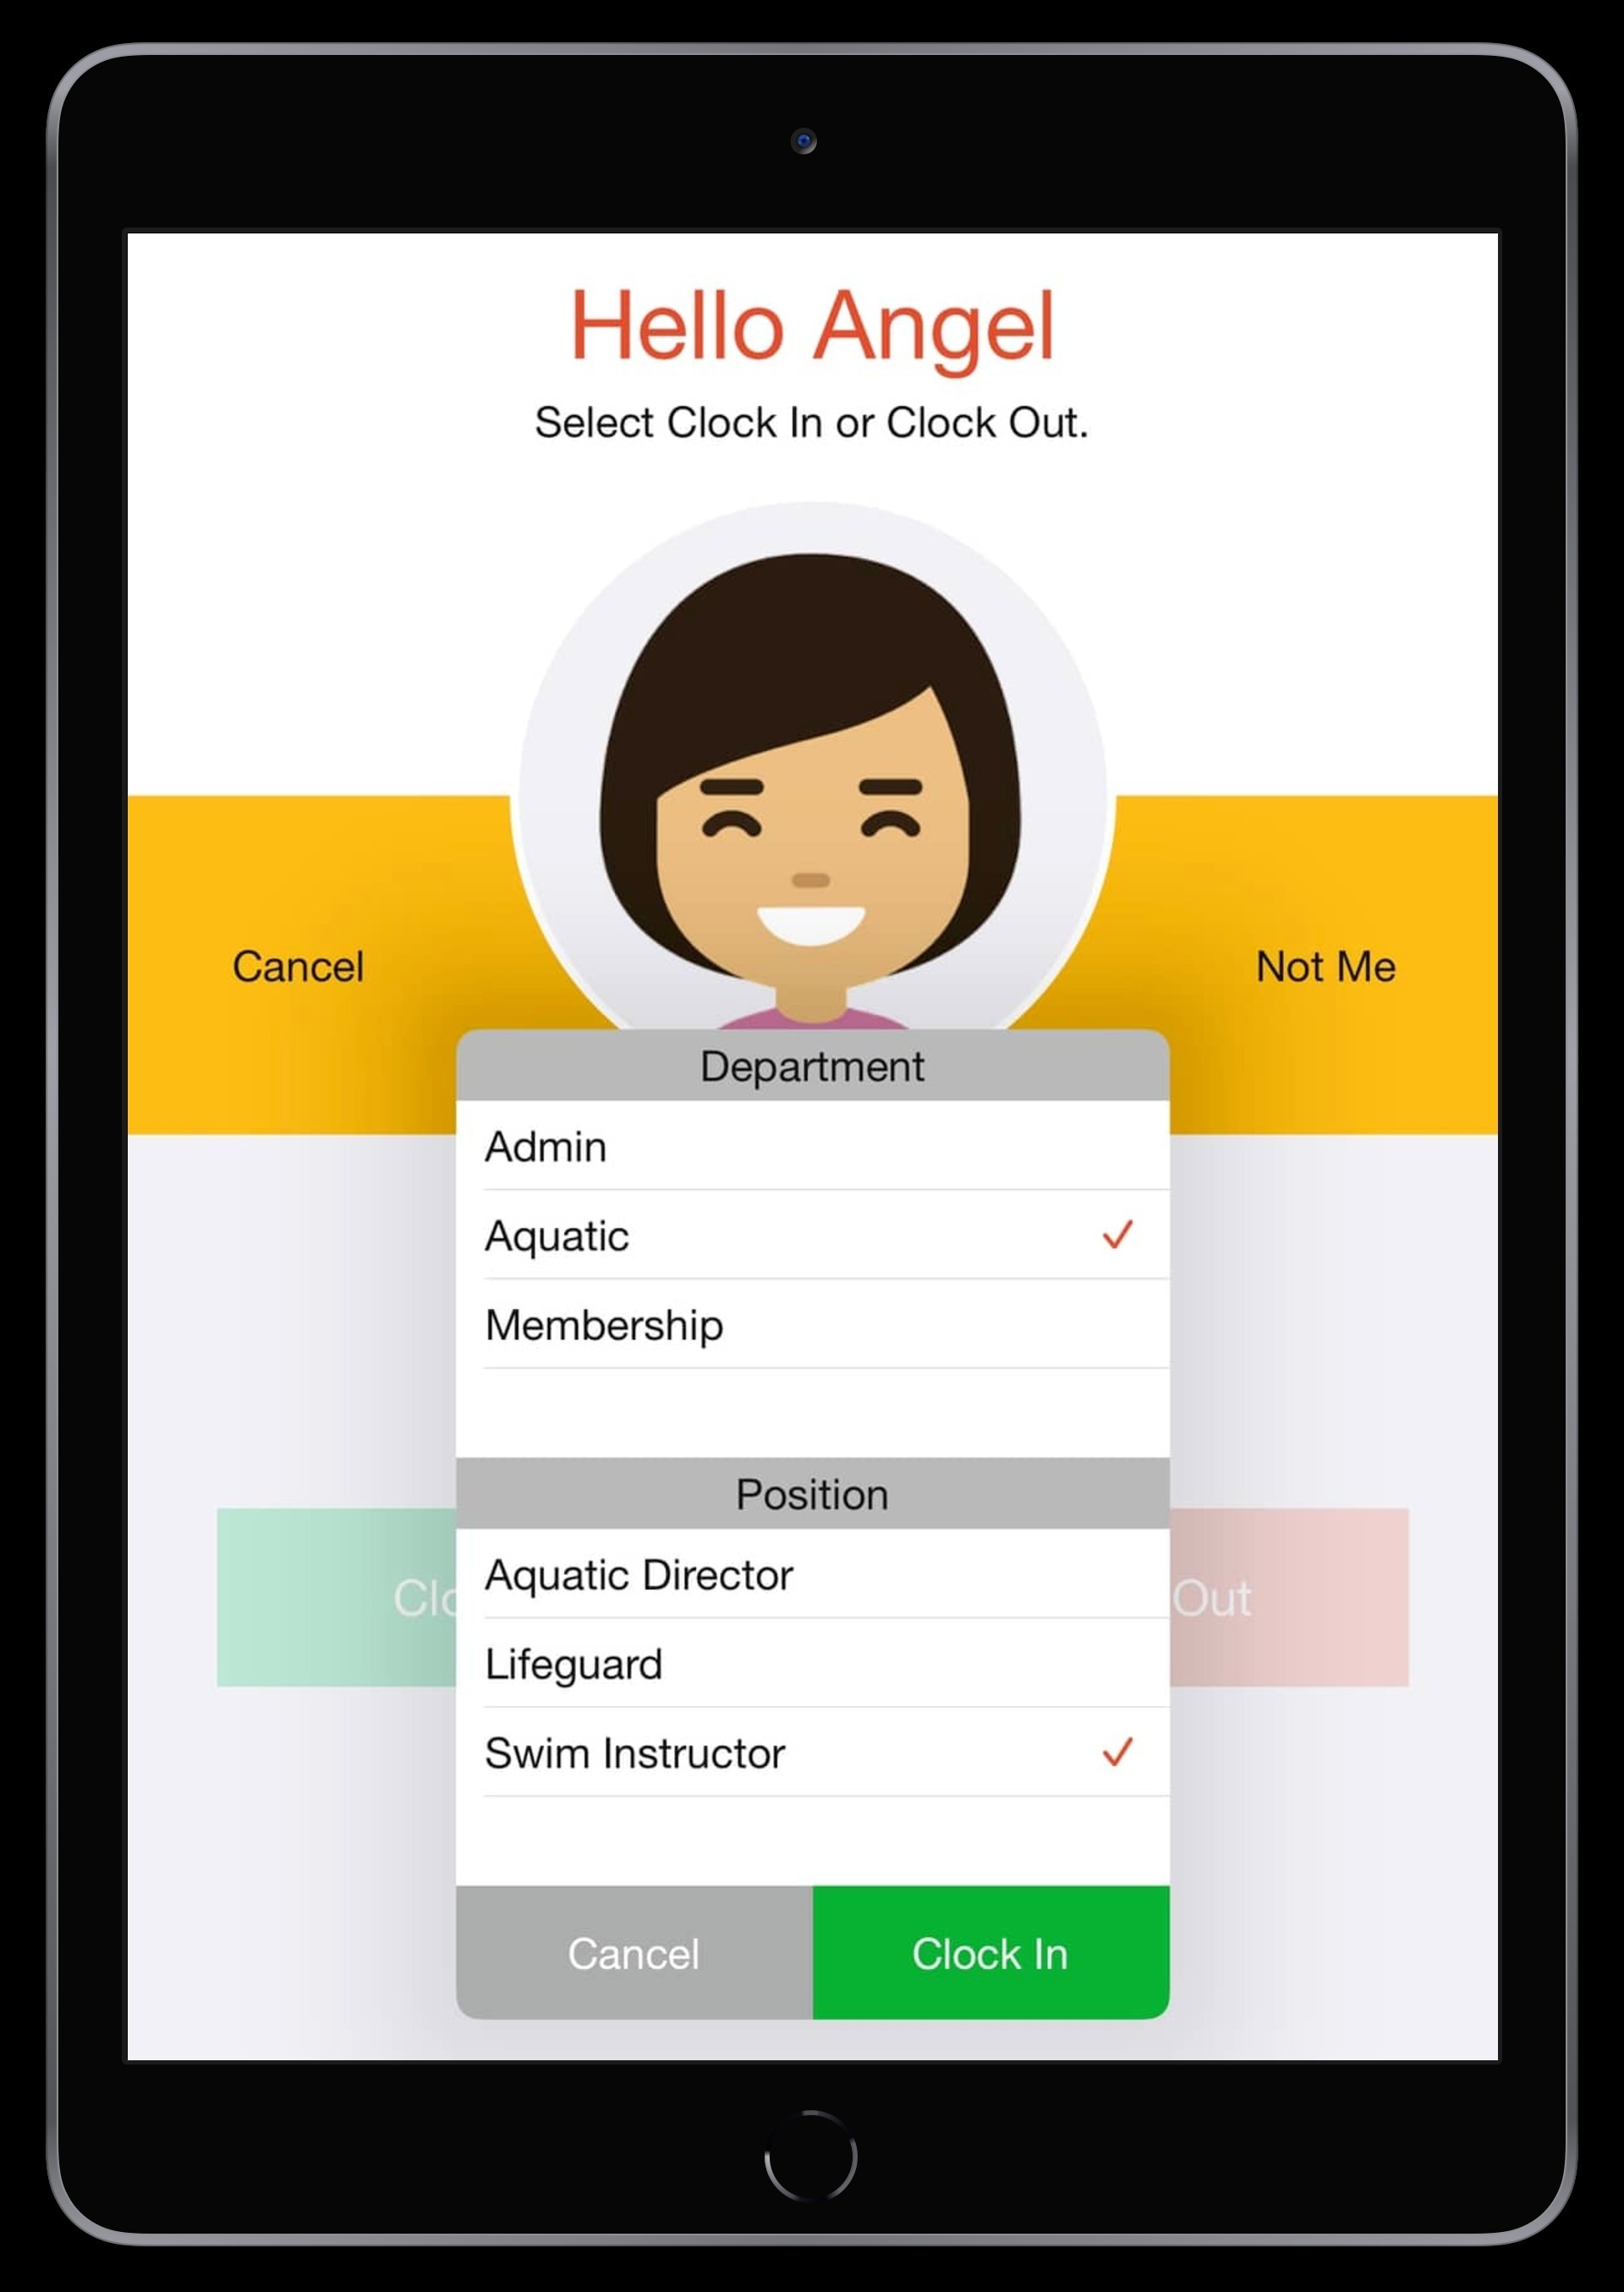
If employees have only one available cost center at the site, it will be applied automatically. If they don't have any available cost centers at the site, they can optionally be denied access. This can be configured as follows:
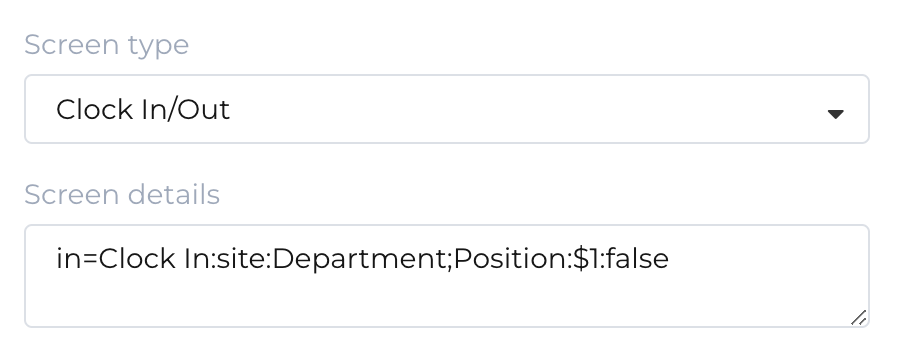
in=Clock In:site:Department;Position:$1:false
Populating Timesheets
Cost Centers can be automatically applied to your timesheets by mapping the data in NoahFace onto the cost center fields in your HR platform.
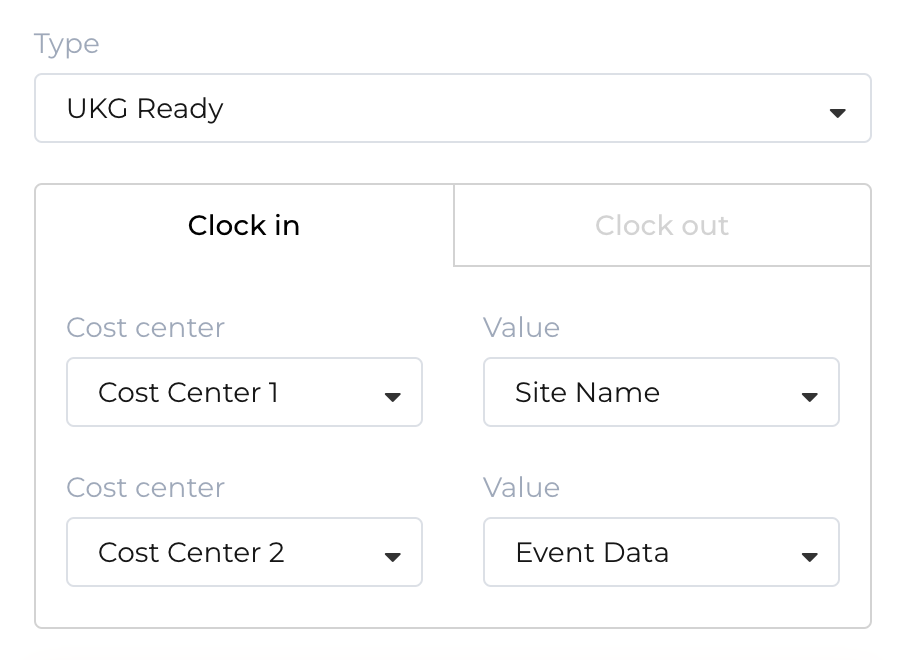
UKG Ready
In your Notification, you can assign each Cost Center from a variety of sources, including the name of Site, the name of the Access Point (ie: iPad kiosk), and the data collected with the event (ie: a manually selected cost center). For example:
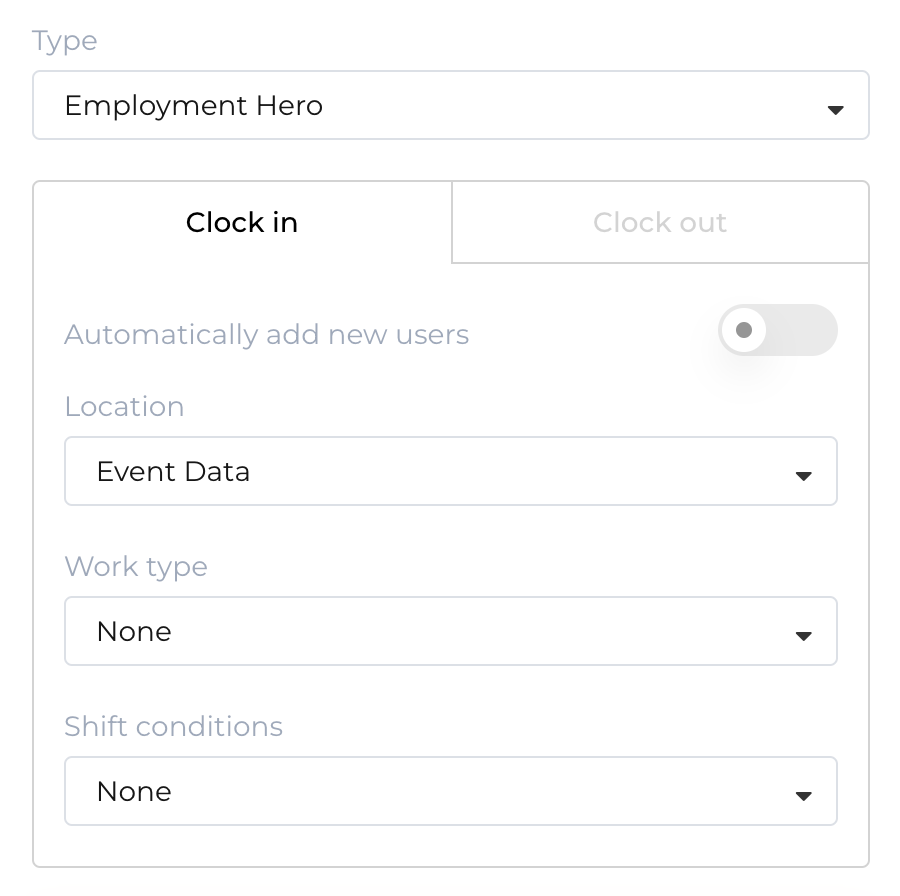
Employment Hero
In your Notification, you can assign your Location from a variety of sources, including the name of Site, the name of the Access Point (ie: iPad kiosk), and the data collected with the event (ie: a manually selected cost center). For example:
Was this article helpful?
That’s Great!
Thank you for your feedback
Sorry! We couldn't be helpful
Thank you for your feedback
Feedback sent
We appreciate your effort and will try to fix the article